How Professional Painters Prepare Interior Walls Before Painting
Every flawless interior paint job starts long before a brush touches the wall. The difference between a smooth, durable finish and one that chips or peels often lies in preparation. How professional painters prepare interior walls before painting is a detailed, methodical process that ensures paint bonds correctly, colours stay vibrant, and surfaces look polished for years. Homeowners rarely see this work, but it’s the foundation of a high-quality result.
Professional painters approach preparation as a critical stage rather than a quick step. They inspect every surface, repair flaws, clean thoroughly, protect surrounding areas, and use the right primers. This attention to detail sets them apart from casual work and guarantees lasting value for your investment.
Step 1 – Start With a Thorough Wall Inspection
Before any prep begins, professionals inspect the interior walls from top to bottom. This step helps them find hidden problems early.
They look for these common issues:
- Cracks in drywall or plaster
- Peeling or bubbling paint from previous jobs
- Water stains or soft spots caused by leaks
- Uneven texture or poor patchwork from earlier repairs
Experienced painters also check how the surface feels under light pressure. If a wall feels chalky, crumbly, or unstable, it won’t hold paint well.
They may also test for lingering moisture behind stains. This ensures the issue isn’t active or still causing damage. Any soft drywall, mold risk, or ongoing leak needs resolution before painting begins.
A full inspection like this ensures painters plan for repairs, priming, and material choices based on the real condition of the space.
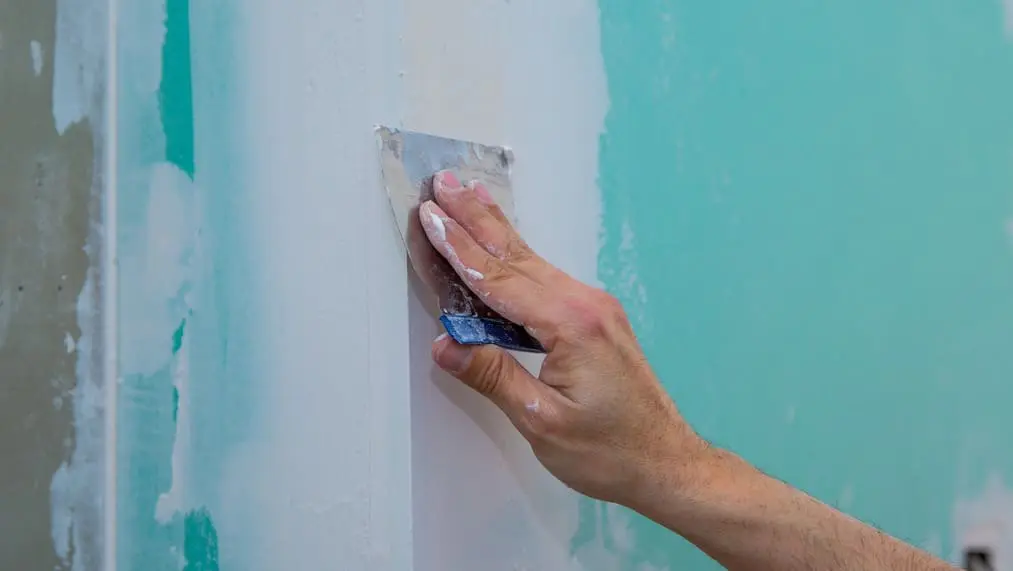
Step 2 – Repair All Surface Flaws (Not Just the Obvious Ones)
Once the inspection is complete, professional painters repair all surface flaws. This step is critical for achieving a smooth, polished finish. Paint magnifies imperfections — it doesn’t hide them — which is why prep work matters so much.
Pros don’t just fix what’s visible. They run hands along walls, use lighting to spot hidden defects, and address everything that could cause texture or adhesion issues.
Here’s what they commonly fix:
- Nail holes and dents from pictures, shelving, or furniture bumps
- Hairline cracks caused by house settling or shifting drywall seams
- Rough patch jobs from previous DIY repairs that weren’t sanded properly
- Surface gouges or scrapes from moving furniture or pets
After filling these areas with joint compound or spackle, they sand each repair until it’s flush. They also feather edges so that once primed and painted, the surface appears seamless.
For larger cracks or wall damage, pros use mesh tape, joint compound layering, or even partial drywall replacement if needed. These aren’t cosmetic fixes — they’re structural improvements that extend the life of the paint.
When done correctly, no one sees the prep — they just see the perfect finish. That’s the goal.
Step 3 – Clean the Walls and Let Them Dry Completely
Even after repairs, interior walls must be cleaned before any paint can go on. Dust, oils, and residues create a barrier that stops paint from bonding properly. That’s why professionals always clean surfaces — even if they look fine at a glance.
Painters use a soft sponge or lint-free cloth with mild detergent to wipe down walls. In kitchens or bathrooms, they may use a degreaser to remove residue from cooking or humidity. Skipping this step can lead to peeling, bubbling, or uneven texture after paint dries.
Common areas that require extra attention include:
- Baseboards and lower walls (where dust collects)
- Ceilings near HVAC vents (where soot builds up)
- Corners and trim lines (where cobwebs or debris stick)
Once cleaned, painters let the walls dry completely — often overnight. Applying paint to damp surfaces traps moisture, which can lead to long-term damage or mold.
Professionals also keep the room ventilated during this step. Open windows or fans help speed up drying and clear out odors from cleaning products.
Step 4 – Mask and Protect Everything That Shouldn’t Get Painted
Before any primer or paint goes on, professional painters take time to protect the space. This isn’t optional — it’s a critical part of the job.
Painters use tape, plastic sheeting, and clean drop cloths to mask off every surface that shouldn’t be painted. That includes:
- Baseboards and trim
- Light switches and outlets
- Ceilings and crown molding (if not being painted)
- Floors and furniture nearby
They also remove wall plates and vents whenever possible, instead of trying to paint around them. This results in cleaner lines and fewer touch-ups later.
By securing edges and using quality materials like painter’s tape that won’t peel finish, pros minimize risk. They can move quickly and confidently without worrying about overspray or drips.
This level of protection also makes cleanup fast and stress-free for the homeowner. It shows care, precision, and respect for the home.
Step 5 – Prime the Walls Where Needed (Not Everywhere)
Priming is one of the most misunderstood parts of wall preparation. Homeowners often assume the entire room must be primed — but professionals know better.
Experienced painters evaluate where primer is truly needed. They don’t waste materials or time on unnecessary steps. Instead, they focus on areas where primer actually makes a difference:
- New drywall or fresh repairs that are porous and absorb paint unevenly
- Previously patched spots where filler could cause flashing under paint
- Dramatic colour changes, especially from dark to light tones
- Stained or water-damaged areas that need blocking before repainting
They use different primers for different problems — stain-blocking formulas for water spots, or drywall primers for fresh skim coats.
By targeting specific zones instead of blanket priming, professionals save time while still ensuring flawless results. This approach also helps maintain consistent sheen and colour from wall to wall.
A Smooth Finish Starts With Expert Preparation
Proper wall prep isn’t just a box to check — it’s the reason a great paint job lasts. From the first inspection to the final coat of primer, professional painters know that rushing prep leads to disappointment.
They don’t rely on guesswork or shortcuts. They follow a proven sequence: identify issues, fix flaws, clean surfaces, mask carefully, and prime only where needed. Each step protects your investment, improves appearance, and ensures the paint performs over time.
If you’re planning an interior painting project, don’t settle for a quick coat of colour. Hire a crew that treats your walls like a canvas, not a shortcut.
Want your walls to look flawless — and stay that way? Talk to a professional painting expert who takes prep as seriously as the finish. Book your initial painting consultation today.
